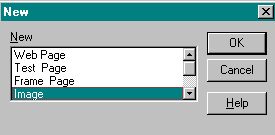
- Click the New button
 on the Standard toolbar.
Or, select New on the File menu.
The New box appears.
- In the New box, select Image.
- Click OK.
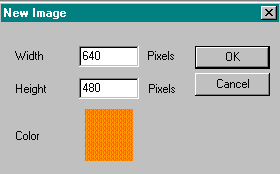
The New Image box is displayed.
- Set the width to 640 pixels if you want the bar to span the entire width of the page.
- Set the length to 5 or 10 pixels to create a thin horizontal line.
- Set the background color to white.
- On the File menu, select Object, Load to load an object you have already created.
The object is loaded into the ImagEditor.
See Create Image Objects for instructions on creating objects.
- Select Stamp Into Selection on the Area menu.
The object is copied throughout the width and breadth of the image. - Select Affix a Copy of All Objects on the Objects menu.
- Click on the Save button or select Save As from the File menu.
- Type in the file name.
- Click on the Save button to save the file.
- To insert the bar into a Web page, select Image from the Insert menu.
- Follow the instructions above on creating an image.
Set the width, and height. Since you are creating a bullet, the size should be kept at a minimum. - Click on the Brush Select button
on the Area Toolbar.
- Click on one of the round or square Brush buttons on the Brush Shapes Toolbar to set the shape for the bullet.

- Click inside the image area.
The brush area is outlined on the background. - Load the object from the File, Object sub menu.
- Select Stamp Into Selection on the Area menu.
The object is copied throughout the selected area. - Click on the bullet area to make the bullet area active.
(The outline around the loaded object should not be visible. See Image Preferences for instructions on setting the Color of the Current Object Outline.) - Select Grab Object from the Area menu.
The Describe Object box is displayed. - Type a description.
- Select Save Object as Transparent GIF from the File menu.
The Save As box is displayed. - Type the bullet image file name.
- Click on the Save button to save the image.